
Healthy & nutritious Ragi Roti recipe with detailed step by step pictures. Ragi Chapati, Nachni Roti recipe is best for a quick and healthy meal with any vegetable side dish.

Ragi Roti or Nachni Roti is a healthy & delicious flat bread recipe made with finger millet flour and whole wheat flour. Ragi or Finger Millet is highly nutitrious and has a lot of health benefits. South Indian cuisine uses ragi in many forms - from making breakfast recipes like ragi idli, ragi idiyappam, ragi dosa and ragi porridge, it can also be made as flat bread. At home, we make a version of the ragi rotti using moringa leaves known as ragi murungai keerai adai. In this recipe, we use a combination of ragi flour and wheat flour to soft ragi chapati. It can be served with any paneer based, veg based gravy recipes.
Jump to:
Key Ingredients
Ragi or Finger Millet flour is one of the main ingredients to make this soft ragi roti recipe.
Whole Wheat flour is one of the other ingredients used to make the dough for ragi chapati.
Salt and Hot Water are added to make the dough.
Oil/Ghee can be used to cook the chapati.
For full list of ingredients and exact measurements, check the recipe below.

Tips & Important Notes for Making Ragi Roti
Making Ragi Chapati is an easy and quick recipe that can be made with little practice and experience. Follow the below tips to make the ragi rotis perfectly without any cracks and keep them soft for longer duration.
Use hot water to make the ragi chapati dough - this helps bind the dough together and keeps the rotis soft even after cooking & storing for a few hours.
I make the dough for my rotis in my food processor. The dough turns out extremely soft and well-knead. Check the process below.

How to make Roti Dough in Food Processor
In the food processor, set the flour kneader blade and add the flour along with salt as needed.
Close the lid of the food processor and run it on low speed.
As the food processor is running, add water little by little through the feeder pipe on the lid.
In 2-3 minutes, the dough begins to come together without traces of dry flour. At this stage stopping adding anymore water.
Run the food processor at medium speed for 2-3 mins until the dough forms a single ball and comes together.
Remove the dough from the food processor and knead it by hand for a minute. That's it! Quick and easy process to make soft roti dough.

Substitutions & Variations
Adjust the proportion of the ragi flour to wheat flour depending on your preference. The more ragi flour, dough becomes slightly harder to roll out thin or without cracks.
You can add finely chopped onions, grated carrots, finely chopped green chillies and cilantro to the dough to make vegetable ragi rotti.
Serving Suggestions
Ragi Roti is best served hot/warm with any paneer, mushroom, egg or vegetable gravy on the side. It can also be used as a wrap with roasted veggies. To keep the ragi chapati soft, place it in a hot pack wrapped in a cotton cloth or kitchen tissues. Alternatively, they can also be wrapped in aluminum foil when war, to be packed in lunch boxes. They are best consumed the same day, but can be stored overnight at room temperature too.

Similar Recipes
You must use the category name, not a URL, in the category field.Ragi Roti Recipe with Step by Step Pictures
In a food processor with dough blade attachment, add ½ cup ragi flour and 1 cup whole wheat flour along with salt as needed.

Close the lid of the food processor and start running on low speed. Using the feeder pipe on the lid, slowly pour hot water in regular intervals. In 2-3 minutes, the dough starts to form. Increase the speed of the food processor and let the dough come together into a single ball. It should take another 2 minutes. If there is too much dry flour, add 1 teaspoon water at a time and continue running on low speed until there is no dry flour left.

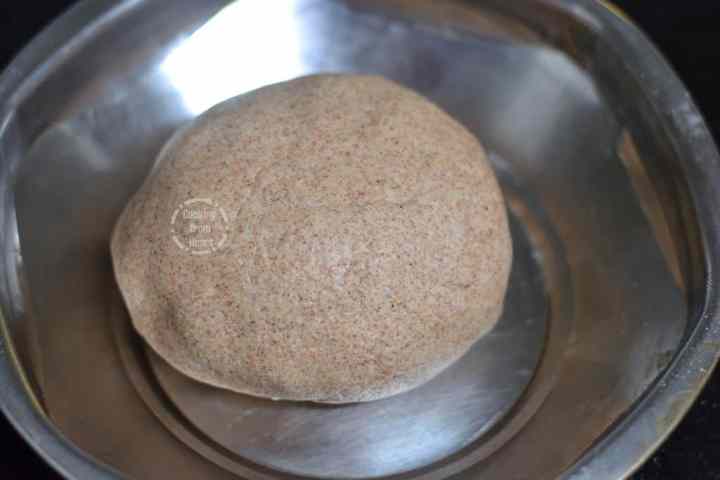
Dump the dough onto a bowl, scrapping the food processor. Knead it to bring the dough together for a minute.

Add a few drops of oil on top and knead again for a minute.

Let it rest covered for 5-15 mins.
Divide the dough into small balls, equally sized. Roll the balls of dough between your palms to make it even and smooth.

Take a ball of dough, dust it in whole wheat flour and roll it into disc of ~10cm diameter and it should be about 1mm in thickness. Dust with flour if it sticks to the rolling pin. Repeat this with rest of the dough, keeping each rolled out roti on a newspaper or plate, not sticking with each other.


Meanwhile heat a tawa on medium flame. Once hot, put a rolled out roti. Cook for 10 secs and then flip.

Cook the other side for not more than 10 secs and flip again.

Drizzle a few drops of oil/ghee on both sides and cook until there are golden spots all over the roti. Remove from tawa.

Place the prepared rotis between tissue papers/cotton cloth in a box or hotpack to retain freshness and softness for many hours after making. Serve hot with any curry/gravy of your choice.

Recipe Notes
- You can also knead the dough by hand. Knead the dough with the palm of your hand for 5-6 mins gently until it is soft and crack-free, pliable.
- Adjust the ratio of the ragi flour to whole wheat flour depending on your preference.
- I used store bought ragi and wheat flour, it works out well.
I would be delighted to know if you have tried this recipe, don't forget to share your feedback and comments below. If you have any questions, you can e-mail me! I am also available on Facebook, Pinterest, Instagram and Twitter 🙂
📖 Recipe

Ragi Roti | Ragi Chapati | Nachni Roti
MEASUREMENT
1 cup = 250ml, 1 tablespoon = 15ml, 1 teaspoon = 5ml
Ingredients
- ½ cup Ragi Flour
- 1 cup Whole Wheat Flour
- Hot Water as needed
- Salt as needed
- Oil/Ghee as needed to cook the rotis
Instructions
- In a food processor add ½ cup ragi flour and 1 cup whole wheat flour along with salt as needed.
- Close the lid of the food processor and start running on low speed. Using the feeder pipe on the lid, slowly pour hot water in regular intervals. In 2-3 minutes, the dough starts to form. Increase the speed of the food processor and let the dough come together into a single ball. It should take another 2 minutes. If there is too much dry flour, add 1 teaspoon water at a time and continue running on low speed until there is no dry flour left.
- Dump the dough onto a bowl, scrapping the food processor. Knead it to bring the dough together for a minute.
- Add a few drops of oil on top and knead again for a minute.
- Let it rest covered for 5-15 mins.
- Divide the dough into small balls, equally sized. Roll the balls of dough between your palms to make it even and smooth.
- Take a ball of dough, dust it in whole wheat flour and roll it into disc of ~10cm diameter and it should be about 1mm in thickness. Dust with flour if it sticks to the rolling pin. Repeat this with rest of the dough, keeping each rolled out roti on a newspaper or plate, not sticking with each other.
- Meanwhile heat a tawa on medium flame. Once hot, put a rolled out roti. Cook for 10 secs and then flip.
- Cook the other side for not more than 10 secs and flip again. Drizzle a few drops of oil/ghee on both sides and cook until there are golden spots all over the roti. Remove from tawa.
- Place the prepared rotis between tissue papers/cotton cloth in a box or hotpack to retain freshness and softness for many hours after making. Serve hot with any curry/gravy of your choice.
Notes
- You can also knead the dough by hand. Knead the dough with the palm of your hand for 5-6 mins gently until it is soft and crack-free, pliable.
- Adjust the ratio of the ragi flour to whole wheat flour depending on your preference.
- I used store bought ragi and wheat flour, it works out well.


Sowmya
Perfect round and healthy roti made using Ragi flour. Great preparation Ramya. Love your presentation style.
Ramya
Thanks Sowmya 🙂